Introduction
In Photoshop, saving works a bit differently from most other applications. Instead of working with one main file type—such as .docx in Microsoft Word—Photoshop offers a variety of ways to save your images.
In this lesson, we'll talk about the different saving options in Photoshop, along with some common reasons to save files in different formats.
In this lesson, we'll talk about the different saving options in Photoshop, along with some common reasons to save files in different formats.
Creating new images
The New command lets you create a blank image.
To create a new image:
- Do one of the following:
- To base the image dimensions and resolution (Photoshop) on the Clipboard contents, choose File > New. If the Clipboard does not contain image data, the image dimensions and resolution are based on the last image you created.
- (Photoshop) To base the image size on the default dimensions and resolution or the last entered settings, hold down Alt (Windows) or Option (Mac OS) when you choose File > New.
- If desired, type a name for the image, and set the width and height.
- (Photoshop) Set the resolution and mode. For more information, see About image size and resolution and About color modes and models (Photoshop).
- Select an option for the contents of the background layer (Photoshop) or first layer (ImageReady) of the image:
- White to fill the background or first layer with white, the default background color.
- Background Color to fill the background or first layer with the current background color. (See Choosing foreground and background colors.)
- Transparent to make the first layer transparent, with no color values. The resulting document will have a single, transparent layer as its contents.
(Photoshop) To match the width and height of the new image to that of any open image, choose a filename from the bottom section of the Windows menu.
Open an Image in Adobe Photoshop
When using Photoshop Creative Suite 5, you usually have a source image that may have been generated by a scanner, digital camera, or stock image library. You can open an existing image in one of several ways:
- Choose File→Open, select the file in the Open dialog box, and then click the Open button.
- Choose File→Browse. By selecting Browse instead of Open, you launch the Adobe Bridge application.
- Double-click an image in the Mini Bridge panel.
If you double-click an image file (one that wasn’t originally created in Photoshop, or from different versions) in a folder, the image may open only in a preview application.
If you’re opening a folder of images that you want to investigate first, choose File→Browse to open Adobe Bridge, the control center for Adobe Creative Suite. You can use Adobe Bridge to organize, browse, and locate the assets you need to create your content. Adobe Bridge keeps available for easy access native AI, INDD, PSD, and Adobe PDF files as well as other Adobe and non-Adobe application files.
You can access the standalone Adobe Bridge application from all applications in the Creative Suite by choosing File→Browse or by clicking the Go to Bridge icon in the upper left corner of the application window. Use the Bridge interface to view images as thumbnails and look for metadata information. For a condensed version of Bridge, click the MB icon on the Application bar.
Saving options
When you save a file in Photoshop, you'll have many different saving options and file formats to choose from:
- PSD: This is the default file type for Photoshop documents, although you won't necessarily use it for every image. It will save your layers and all of the other information in your image so you can easily re-edit it later. PSD files are designed to be opened in Photoshop, so if you want to share the image with others you'll also need to save a copy of the image in a common file format, such as JPEG.
- Common file formats: You can save images in a variety of common file types, such as JPEG and PNG. These file formats can be viewed and edited on almost any computer or mobile device, which makes them well-suited for sharing with others. However, unlike PSD files these formats aren't as useful if you plan to continue editing the file, and they also can't preserve layer information.
- Save for Web: If you're planning to upload an image to the Web—like on a blog or website—you'll want to use the Save for Web feature. This tool allows you to save images that are optimized for the Web, which will make them easier to download and view online. Save for Web also includes several helpful features for preparing images for the Web, such as the option to resize images.
In the image below, you can see three different versions of an image file: the original JPEG file, an edited PSD version, and a final JPEG version that's been resized and saved for Web. You can see that the Web version has a much smaller file size than the original or PSD versions:

Ultimately, the saving option you choose will depend on what you need to do with the image. Let's take a look at a couple of different scenarios to see why you might choose different saving options.
Scenario 1
Let's suppose you're asked to create a new header image for a company website. You've been given a photo to include, and you need to add some text with the company name. Because you'll likely edit and revise this type of project, you'll want to save it as a PSD file. This way, you can easily continue editing the file later on. And because it will eventually be posted online, you'll also want to use Save for Web to create a new JPEG version of the finished image.
Scenario 2
Let’s say you're planning to share some photos from a recent vacation with your friends. You'd just like to make some quick adjustments in Photoshop—such as cropping and rotating—before sharing them. In this case, you could open the original image files in Photoshop, make the necessary adjustments, then save a new version of the edited photos as JPEGs. Because none of these edits are too complicated, you probably don’t need to save a separate PSD version of each image.
As you can see, the saving option you choose will vary from project to project. Before you save an image, take a moment to consider what type of files you'll need. As you start to gain more experience with Photoshop, this process will begin to feel quick and natural.


How to Import and Export in Photoshop
In Adobe Photoshop, importing content is less frequently done because you usually start out editing an image you open in Photoshop. Still, in some cases you will want to import content into the Photoshop program.
Import content to Photoshop
In Photoshop, you can choose to open an image to work with or import content into a document that’s open already. Choose File→Place to import AI, EPS, PDP, or PDF files. These files import into a new layer in the document, and you can then use tools to manipulate the imported content, as shown in the figure.
Export content from Photoshop
Because Photoshop can export paths in a document to Illustrator (in an AI file), your work in Photoshop is easy to manipulate after you open it with Illustrator.
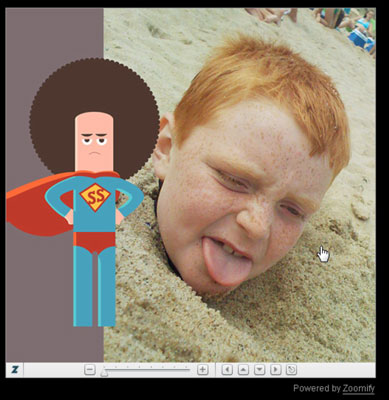
You have another option, though: Export your Photoshop file by using the Zoomify feature. This useful feature can export a large file to a smaller, more compact SWF file. This file can be easily sent by e-mail and opened using the free Flash Player, which almost everyone already has installed.
To use Zoomify, follow these steps:
- Choose File→Export→Zoomify.
- Click Folder in the Output Location section of the Zoomify dialog box and choose a folder location for your SWF file.
- Choose the quality and size and then click OK.The Zoomify Preview window appears. Use this window to zoom in to see detail.You can then retrieve the files that were created in your destination folder and post them online or attach them to an e-mail message.
Moving Photos Between Documents In Photoshop
Photoshop's interface, with two photos currently open.
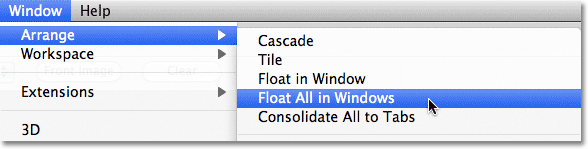
CS4 and CS5 Users Only: Just a quick note, if you are using Photoshop CS4 or CS5 and you're following along with your own images, they may be opening in tabbed documents rather than in floating document windows. As I mentioned earlier, we'll look more closely at these new tabbed documents in the next tutorial, but for now, if you're not seeing floating document windows, go up to the Window menu at the top of the screen, choose Arrange, and then choose Float All in Windows (again, this is for Photoshop CS4 and CS5 users only):
For CS4 and CS5 users, go to Window > Arrange > Float All in Windows.
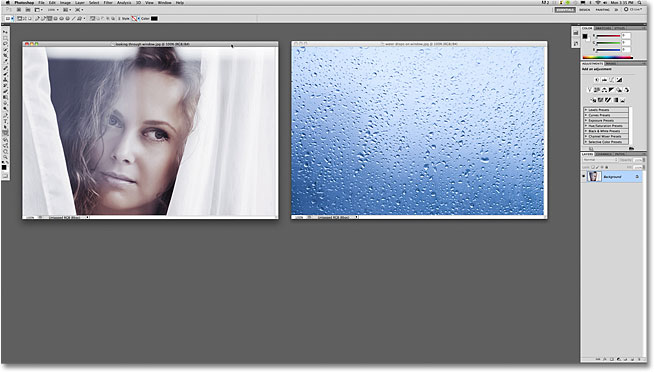
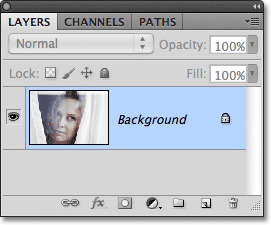
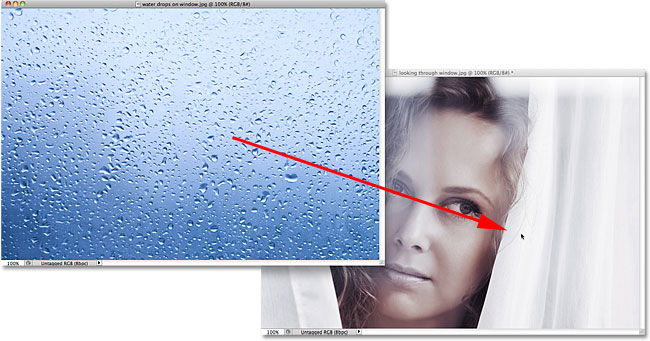
Even though we're seeing two document windows on the screen, Photoshop, for the most part, only works with one document at a time (the other one just kind of sits there being ignored). The one we're working on is known as the "active" document, and the easiest way to tell which one is currently active is by looking in the Layers panel. For example, if we look in my Layers panel right now, we can see that the Background layer's preview thumbnail is displaying the photo of the woman looking through the curtains, which means it's the active document:
The preview thumbnail shows us what's on the layer.
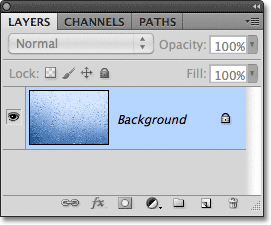
To switch between documents and make a different one active, all we need to do is click anywhere inside of it. I'll click inside the photo of the water drops, which makes it the active document, and if we look again in the Layers panel, we see the water drops image sitting on the Background layer. The other photo no longer appears:
With a different document now active, the Layers panel shows a different image.
The important thing to note here is that only one photo at a time was appearing in the Layers panel, not both, and that's because each photo is open in a completely separate document. Yes, both photos are open in Photoshop and yes, I can see them both on my screen, but that's the end of it as far as Photoshop is concerned. All Photoshop sees is two totally independent documents that have nothing to do with each other. I'd like to blend these two photos together, but there's currently no way I can do it, not unless I can somehow move one of the photos into the other photo's document. Let's look at a few easy ways to do just that.
Method 1: Drag and Drop
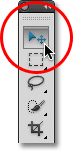
Moving a photo from one document to another in Photoshop can be a real drag. And by that, of course, I mean that the easiest and most common way to move an image between documents is to simply drag it! To do that, we need Photoshop's Move Tool, which you can access by clicking on its icon at the top of the Tools panel. Your Tools panel may appear as a single or double column depending on which version of Photoshop you're using, but the Move Tool is always at the top:
Select the Move Tool.
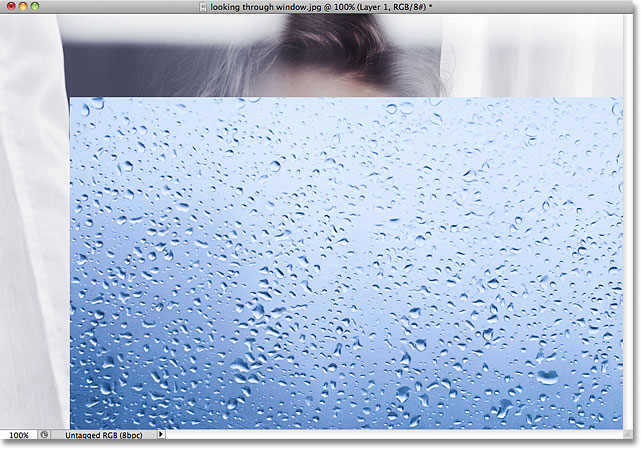
With the Move Tool active, click inside the photo you want to move. Then, with your mouse button still held down, drag it into the other photo's document window. I want to move the water drops photo into the other photo's document, so I'll click inside the water photo document, keep my mouse button held down, and drag the photo into the other document:
Click inside one document, hold your mouse button down, and drag the photo into the other document.
When you release your mouse button, Photoshop drops the photo into the other document:
A copy of the photo appears inside the other photo's document.
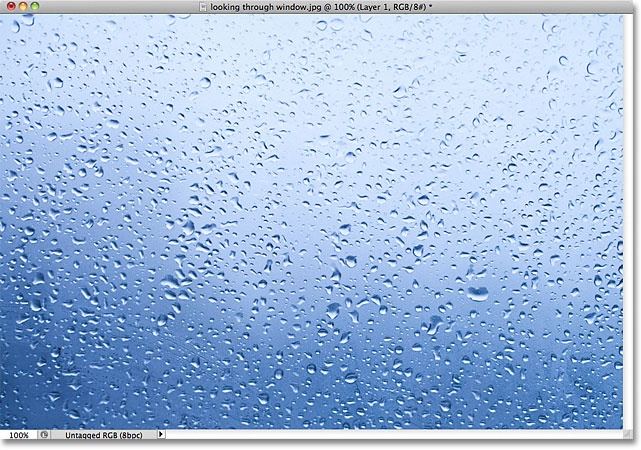
Notice, though, that Photoshop simply dropped the photo at the spot where I released my mouse button, which in my case placed it in the bottom right of the document. That's kind of a sloppy way to work. A better way to move a photo is to hold down your Shift key as you're dragging from one document to another. In other words, click inside the photo you want to move, hold down Shift, drag the photo into the other document, then release your mouse button, then release the Shift key. Adding the Shift key tells Photoshop to center the photo inside the document.
I'll quickly undo my previous step by pressing Ctrl+Z (Win) / Command+Z (Mac), then I'll again drag the water drops photo into the other document, this time while holding down the Shift key. I'll release my mouse button, then release my Shift key (very important that you release your Shift key after releasing your mouse button), and here we can see that the water drops photo now appears in the center of the document:
The photo now appears in the center.
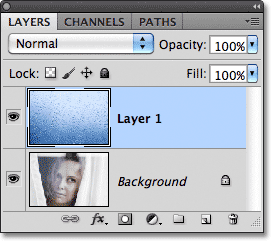
If we look in the Layers panel, we see that we've successfully copied the photo into the other photo's document, as both photos are now showing, one on top of the other. The original photo is sitting on the Background layer, and Photoshop placed the water drops photo on its own new layer above it:
When you move a photo from one document to another, Photoshop automatically adds a new layer for the photo.
If the "drag and drop" approach isn't your thing, we'll look at two more ways to easily move photos between documents next!
Method 2: Duplicating The Layer
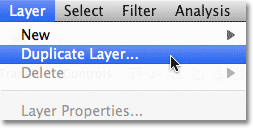
If the freestyle "drag and drop" approach to moving photos between documents doesn't appeal to you, you can also use Photoshop's Duplicate Layer command. First, click inside the document that contains the photo you want to move, which makes it the active document. I'll click inside my water drops photo. Then, go up to the Layer menu in the Menu Bar along the top of the screen and choose Duplicate Layer:
Go to Layer > Duplicate Layer.
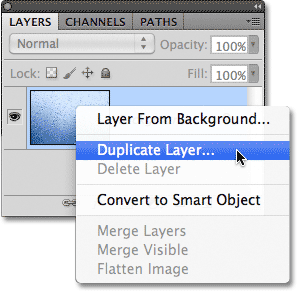
Alternatively, you can Right-click (Win) / Control-click (Mac) directly on the layer itself in the Layers panel and choose Duplicate Layer from the menu that appears:
Right-click (Win) / Control-click (Mac) on the layer and choose Duplicate Layer.
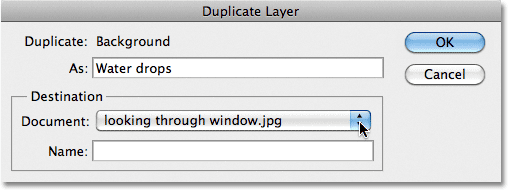
Either way opens the Duplicate Layer dialog box. Enter a name for the layer that the photo will appear on in the other document. I'll name mine "Water drops". Then, in the Destination section at the bottom of the dialog box, select the name of the document you want to move the photo into. I'll select my "looking through window.jpg" document. Yours, of course, will probably be named something different:
Name the new layer, then select the destination document.
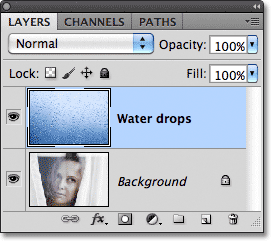
Click OK when you're done, and Photoshop copies the photo from its original document into the new one. I can see in my Layers panel that the water drops photo is now sitting on a layer named "Water drops" above the Background layer:
Photoshop placed the photo on a new layer named "Water drops", since that's the name I gave it in the Duplicate Layer dialog box.
Method 3: Copy And Paste
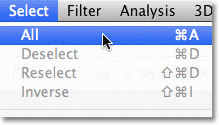
Yet another way to move photos between documents is the standard "copy and paste" method which will be familiar to anyone who's been using a computer for any length of time. First, click inside the document that contains the photo you want to move. Then, go up to the Select menu at the top of the screen and choose All (or press Ctrl+A (Win) / Command+A (Mac) for the keyboard shortcut):
Go to Select > All.
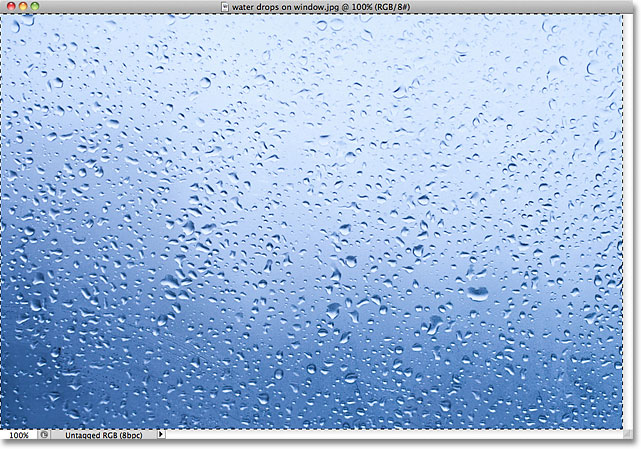
This selects the entire photo. A selection outline will appear around its edges in the document window:
Select the photo you want to move.
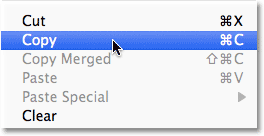
With the photo selected, go up to the Edit menu and choose Copy (or press Ctrl+C (Win) / Command+C (Mac)), which copies the photo to the clipboard:
Go to Edit > Copy.
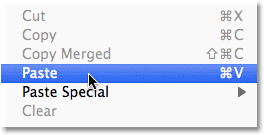
Click inside the document you want to copy the photo into to make it the active document, then go back up to theEdit menu and choose Paste (or press Ctrl+V (Win) / Command+V (Mac)):
Go to Edit > Paste.
Photoshop pastes the photo into the new document, and once again in the Layers panel, we see that the photo has been placed on its own layer above the original image on the Background layer:
One photo has been copied and pasted into the other photo's document.
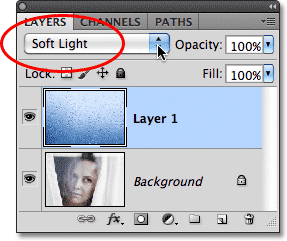
With both photos now inside the same document, I'm ready to blend them together. An easy way to blend photos is to change the layer blend mode. With the water drops photo's layer active (active layers are highlighted in blue), I'll go up to the blend mode option in the top left of the Layers panel and simply change it from Normal to Soft Light:
Changing the top layer's blend mode to Soft Light.
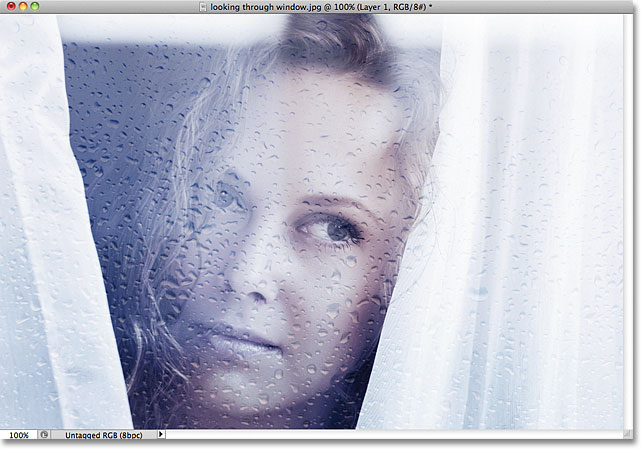
Changing the blend mode was all it took to combine the two photos into a whole new image, with the water drops now appearing on the window the woman is looking through:
Layer blend modes are an easy yet powerful way to achieve interesting results.
Showing and Hiding Extras in Photoshop
Command + H (Mac) | Control + H (Win) can be used to quickly toggle between viewing and hiding a variety of items in Photoshop. For example, when working with shape layers it might be difficult to see exactly how a Drop Shadow layer style might appear if the shape layer’s path is visible. Instead of clicking on another layer to hide the path, use the shortcut above to hide the path. In order to control what is shown/hidden, choose View > Show > Show Extras Options. Here is the list of what items can be shown/hidden:

Note, the first time you use this shortcut on the Macintosh, Photoshop will display a dialog asking “Would you like to use Cmd-H to hide Photoshop (Mac standard), or to hide/show selections, guides, etc. (Photoshop traditional)? Click “Hide Extras” unless you want to “Hide Photoshop” every time you use the shortcut. If you do choose to “Hide Photoshop”, you can change this behavior later by choosing Edit >Keyboard Shortcuts. Set the “Shortcuts For” to Application Menus and toggle the disclosure triangle for the View menu. Scroll down to Extras, change the Shortcut to Command + H and click Accept and then OK.
How to hide or show option in Photoshop
At first go to Windows option then click on hide or show option.
How to hide or show color in Photoshop
At first go to Windows option then click on show or hide color.
How to close all picture in Photoshop
At first go to Windows option then click on close all or Press shift + Ctrl + w from keyboard.
How to recall past work in Photoshop
At first go to Edit option then click on undo or press Ctrl + z from keyboard.
No comments:
Post a Comment